

If you’re an active user of Instagram or Facebook, chances are you’ve come across the name Rohit Zinjurke. A prominent digital creator, Rohit has built an impressive social media presence, captivating millions with his stunning photography and distinctive editing style. His posts consistently rack up countless likes, shares, and engagement, and his growing fan base continues to admire his cinematic, high-quality visuals.
One of the key reasons behind Rohit Zinjurke’s social media success is his exceptional photo editing techniques. His ability to transform ordinary images into visually striking masterpieces has set him apart from the crowd. His signature cinematic aesthetic, characterized by rich contrasts, bold color tones, and an immersive depth of field, has become highly sought after. Many aspiring content creators, photographers, and social media enthusiasts wish to replicate his style but struggle to achieve the same level of finesse through manual editing.
The good news is that you no longer have to spend hours tweaking Lightroom settings to achieve Rohit Zinjurke’s iconic look. With just one click, you can now apply his editing style to your own photos using Rohit Zinjurke’s Lightroom Presets. These professionally designed presets incorporate the exact adjustments and enhancements needed to transform your images, giving them the same cinematic depth, vibrant tones, and professional appeal seen in Rohit’s photographs.
In this article, I’m excited to introduce you to Rohit Zinjurke’s Lightroom Presets and show you how you can effortlessly edit your photos in his signature style. Whether you’re a beginner just starting with Lightroom or an experienced photo editor, this guide will walk you through the entire process—from downloading the presets to applying them seamlessly to your images. If you’re unfamiliar with Lightroom Presets, don’t worry—I’ll cover everything you need to know so you can start editing like a pro right away.
By the end of this article, you’ll be equipped with the knowledge and tools to create stunning, professional-quality photos that showcase the cinematic flair and artistic finesse Rohit Zinjurke is known for. Get ready to elevate your photography game, refine your visual storytelling, and enhance your social media presence with these powerful Lightroom Presets. Let’s dive in!
Who is Rohit Zinjurke?
Rohit Zinjurke is a well-known Indian social media influencer, photographer, and content creator, celebrated for his exceptional photo editing skills and dynamic presence on platforms like Instagram and Facebook. His deep understanding of visual storytelling and meticulous attention to detail have earned him a massive following, making him one of the most recognized figures in the Indian digital photography scene.
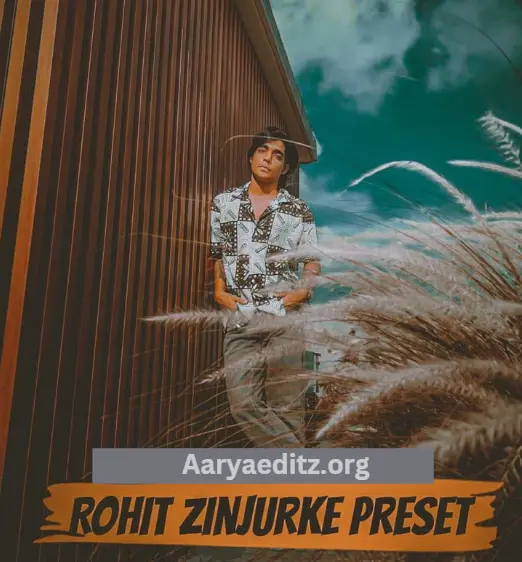
What truly sets Rohit apart is his signature editing style, which seamlessly blends vibrant colors, dramatic lighting, and cinematic tones. This unique approach gives his images a moody, high-impact aesthetic, making them instantly recognizable. His expertise in editing has turned him into a trendsetter, with many aspiring photographers and content creators looking up to him and trying to replicate his signature look.
Beyond his photography, Rohit Zinjurke is also a creator of professional Lightroom presets, enabling others to achieve his signature editing style with minimal effort. These presets are a game-changer for individuals who want to enhance their photos effortlessly, even without advanced editing skills. His ready-to-use Lightroom presets allow users to apply professional-grade adjustments with a single click, making his style accessible to photographers, social media influencers, and content creators worldwide.
Rohit’s content spans a variety of subjects, including landscapes, portraits, and lifestyle photography, all characterized by their high-quality visuals and artistic creativity. His ability to consistently produce stunning, aesthetically captivating images has solidified his place as a leading name in digital photography and social media influence. Through his work, he continues to inspire countless photography enthusiasts to elevate their skills and develop their own unique editing styles.
What is Lightroom?
Adobe Lightroom is a powerful and versatile photo editing software developed by Adobe, widely recognized as one of the best tools for color correction, image enhancement, and professional photo editing. Whether you’re using it on a mobile device or desktop, Lightroom offers a seamless editing experience, making it a go-to choice for photographers, social media influencers, and content creators.
What makes Lightroom stand out from other editing apps is its advanced features and professional-grade capabilities, designed to help users enhance their images with precision and ease. From basic adjustments like brightness and contrast to more advanced editing tools such as HSL (Hue, Saturation, Luminance) adjustments, selective editing, and tone curve modifications, Lightroom provides a comprehensive editing suite for both beginners and professionals.
One of the most powerful features of Lightroom is the Lightroom Preset—a predefined editing filter that allows users to apply professional-quality edits with just one click. With Lightroom Presets, you can instantly enhance your photos, adjusting elements like color grading, exposure, contrast, shadows, and highlights without manually tweaking every setting. This not only saves time but also ensures a consistent and polished look across all your images. Presets are particularly useful for social media influencers, photographers, and brands looking to maintain a cohesive aesthetic in their visual content.
Adobe Lightroom is available for easy installation on both Android and iOS devices through the Google Play Store and Apple App Store, making it accessible to mobile users. Additionally, Lightroom Classic and Lightroom CC are available for desktop users, offering even more in-depth editing tools and cloud storage capabilities.
With its intuitive interface, powerful editing tools, and seamless cross-device accessibility, Adobe Lightroom remains a top choice for anyone looking to elevate their photo editing skills and create stunning, professional-quality images with ease.
How to Download Rohit Zinjurke Preset?
To achieve Rohit Zinjurke’s signature cinematic and vibrant editing style, downloading and using his Lightroom Presets is the easiest and most effective way. These presets allow you to apply pre-configured adjustments to your photos instantly, giving them a professional, eye-catching look. Follow the step-by-step guide below to download, install, and use Rohit Zinjurke’s Lightroom Presets seamlessly.
Step 1: Find a Reliable Source
Before downloading, it’s crucial to ensure that you’re getting the presets from a trusted source to avoid malware or low-quality files. Rohit Zinjurke’s presets are typically shared through:
- Official Websites: Rohit may have a dedicated website or store where he officially shares his presets.
- Social Media Links: Platforms like Instagram, YouTube, and Facebook may have direct download links in his posts or video descriptions.
- Photography Communities & Forums: Some presets are shared among photography enthusiasts who exchange tools and techniques.
🔹 Important: Be cautious when downloading from third-party websites to avoid potential scams or harmful files.
Step 2: Download the Preset File
Once you find a verified source, click on the download link provided. The preset file will usually be in one of the following formats:
- ZIP File (Containing multiple presets)
- DNG File (For mobile Lightroom users)
- XMP File (For desktop Lightroom users)
Make sure you download the format compatible with your device.
Step 3: Extract the ZIP File (If Required)
If the presets are in a ZIP file, you’ll need to extract them first before importing them into Lightroom.
- For Mobile Devices: Use a file manager or a free unzip app to extract the files.
- For Desktop: Right-click the ZIP file, then select “Extract All” to access the preset files.
Step 4: Import the Preset into Adobe Lightroom
Now that you have the preset file, follow these steps to import it into Lightroom:
For Lightroom Mobile (Android & iOS):
- Open the Adobe Lightroom app on your mobile device.
- Tap on a photo you want to edit.
- Navigate to the “Presets” section.
- Tap the three dots (or “Add Preset” button).
- Select “Import Preset” or “Import from File.”
- Choose the downloaded preset file (DNG/XMP) and follow the on-screen instructions.
- Your preset will be saved and ready to use.
For Lightroom Desktop (Windows & Mac):
- Open Adobe Lightroom Classic or Lightroom CC.
- In the left panel, go to the “Presets” section.
- Click the “+” (plus icon) or “Import Presets” option.
- Locate the folder where you extracted the preset files.
- Select the XMP presets you want to add and click “Import.”
- Your Lightroom presets will now be available in the Presets Panel.
Step 5: Apply the Preset to Your Photos
Once the preset is successfully imported, you can apply it to any of your photos.
- Open a photo in Lightroom.
- Go to the “Presets” panel.
- Click on Rohit Zinjurke’s preset you just imported.
- Watch as your image transforms instantly with the preset’s cinematic and moody look.
Step 6: Fine-Tune the Edits (Optional)
While the preset will provide a professional look instantly, you may want to make minor adjustments to fit your image perfectly. You can tweak settings like:
✅ Exposure – Adjust brightness for dark or overexposed images.
✅ Contrast & Highlights – Modify details in bright and dark areas.
✅ Saturation & Vibrance – Control the intensity of colors.
✅ Shadows & Clarity – Enhance textures and depth.
💡 Pro Tip: Every photo is different, so feel free to adjust the preset’s settings to match your unique style.
By following these simple steps, you can download, install, and apply Rohit Zinjurke’s Lightroom Presets effortlessly, creating visually stunning photos that reflect his signature cinematic style. 🚀
How to Use Rohit Zinjurke Lightroom Preset?
Editing photos like Rohit Zinjurke is now easier than ever with his Lightroom Presets. These presets allow you to achieve a cinematic, high-quality edit with just one click. Follow the simple steps below to apply Rohit Zinjurke’s Lightroom Presets to your photos effortlessly.
Step 1: Download & Install Adobe Lightroom
First, ensure you have Adobe Lightroom installed on your device. You can download it from:
📲 Google Play Store (For Android Users)
📲 Apple App Store (For iOS Users)
Once installed, open the app and import the photo you want to edit.
Step 2: Select & Copy Preset Settings
- Import the downloaded preset into Lightroom.
- Open the preset image in Lightroom.
- Tap the three-dot menu (⋮) at the top-right corner.
- Select “Copy Settings” to copy all preset adjustments.
Step 3: Apply the Preset to Your Photo
- Open the photo you want to edit.
- Tap the three-dot menu (⋮) again.
- Select “Paste Settings” to apply the preset to your image.
- Instantly, your photo will transform with Rohit Zinjurke’s cinematic effect.
Step 4: Fine-Tune the Edits (Optional)
Every image is unique, so feel free to adjust the:
✅ Brightness & Exposure – If your photo is too dark or too bright.
✅ Contrast & Shadows – For a more dramatic effect.
✅ Color Tones – To enhance warmth or coolness based on your style.
With just a few tweaks, you can customize the preset to perfectly match your photo’s lighting and colors.
Lightroom Preset System Requirements
Before using Lightroom and Rohit Zinjurke’s presets, make sure your device meets these minimum specifications:
- Operating System: Android 6.0 (Marshmallow) or later
- RAM: 2 GB or more
- Storage: At least 1 GB of free space
- Processor: Quad-core CPU for smooth editing
Best Features of Rohit Zinjurke Preset
Rohit Zinjurke’s Lightroom Presets are designed to give your photos a professional, high-quality look. Some of the best features include:
🔥 Advanced Color Grading – Achieve rich and vibrant tones effortlessly.
📷 Full Compatibility – Works with both RAW and JPEG image formats.
🎨 Customizable Presets – Easily tweak settings to match your personal style.
🌄 HDR Merge Support – Create high-dynamic range (HDR) images for better details.
📸 Optimized for High-Resolution Images – Ensuring your photos look crisp and clear.
✅ Free to Download – Get powerful editing features at no cost.
🚀 Bug-Free & Smooth Performance – Enjoy seamless editing without crashes.
Need Help? Watch the Tutorial or Ask for Support!
If you need more guidance on using Lightroom Presets, you can:
📹 Watch the tutorial video (linked below) for a step-by-step demonstration.
💬 Leave a comment with your questions, and we’ll be happy to assist you.
With Rohit Zinjurke’s Lightroom Presets, you can transform your ordinary photos into stunning, cinematic masterpieces in seconds. 🚀✨
Frequently Asked Questions
What are Rohit Zinjurke Lightroom Presets?
Rohit Zinjurke Lightroom Presets are professionally crafted editing tools designed to help photographers and content creators achieve the distinct cinematic style seen in Rohit Zinjurke’s photos. These presets contain pre-configured adjustments, including color grading, tone corrections, and contrast enhancements, allowing users to apply high-quality edits with a single click. Whether you are an amateur or a professional, these presets provide an effortless way to enhance your images, making them visually appealing and social media-ready.
How do I download Rohit Zinjurke Lightroom Presets?
Downloading Rohit Zinjurke’s Lightroom Presets is simple, but it’s crucial to ensure that you’re using a reliable source. You can find these presets on his official website, social media profiles, or trusted photography communities. Be cautious when downloading from third-party websites to avoid malware or unauthorized versions. Once you find the correct source, follow the instructions provided to download the preset files securely.
Are these Lightroom presets free?
Some of Rohit Zinjurke’s Lightroom Presets are available for free, while others are part of a premium collection that may require a purchase or subscription. Before downloading, check the details on the website or platform offering the presets. Free presets provide a great way to test the style, while paid versions often include more advanced adjustments and professional-grade enhancements.
How do I install the presets in Lightroom?
Installing the presets is a straightforward process. After downloading the preset file, which typically comes in ZIP, DNG, or XMP format, you will need to extract and import it into Lightroom. If you are using Lightroom Mobile, go to the presets section and use the “Import Preset” option. For Lightroom Desktop (Classic or CC), open the Presets Panel, click the “+” icon, and choose the option to import presets. Once imported, the presets will be readily available for use in your future edits.
Can I use these presets on both mobile and desktop Lightroom?
Yes! Rohit Zinjurke’s Lightroom Presets are fully compatible with both Lightroom Mobile and Lightroom Desktop. Whether you are editing on a smartphone or a computer, the installation and application process remains seamless. However, ensure you download the correct file format that corresponds with your version of Lightroom—DNG for mobile users and XMP for desktop users.
Will these presets work on all photos?
While Rohit Zinjurke’s Lightroom Presets are designed to enhance a wide range of images, the final outcome may vary depending on factors like lighting conditions, composition, and camera quality. These presets provide an excellent base, but you may need to make slight manual adjustments after applying them to get the perfect look tailored to your specific image.
Can I customize the preset after applying it?
Absolutely! One of the great advantages of Lightroom Presets is their flexibility. Once you apply a preset, you can further tweak settings such as exposure, contrast, saturation, highlights, and shadows to match your personal style or specific photo requirements. This customization ensures that your final image maintains a unique touch while retaining the professional aesthetic of Rohit Zinjurke’s signature style.
Are these presets compatible with RAW and JPEG images?
Yes, these presets work with both RAW and JPEG files. However, for the best results, using RAW images is recommended because they retain more detail and allow for better adjustments. That said, JPEG users can still achieve stunning edits with these presets, making them versatile for photographers and influencers across different platforms.
Conclusion
Rohit Zinjurke Lightroom Presets are an exceptional tool for photographers, content creators, and social media enthusiasts looking to achieve a high-quality, cinematic look in their images with minimal effort. Whether you’re new to editing or an experienced professional, these presets streamline the process by applying predefined settings that instantly enhance your photos.
By using these presets, you can replicate Rohit Zinjurke’s signature style, characterized by vibrant colors, rich contrasts, and dramatic tones, making your photos stand out effortlessly. Since they are compatible with both mobile and desktop Lightroom, users have the flexibility to edit on their preferred devices without compromising on quality. The ability to customize presets further enhances their usability, allowing you to fine-tune settings to perfectly match your image’s unique characteristics.
If you want to elevate your photo editing skills and create visually stunning images, Rohit Zinjurke’s Lightroom Presets are definitely worth trying. Download them today and transform your ordinary shots into extraordinary masterpieces with just one click.