

Editing Photos on Your Mobile Device Has Never Been More Convenient
With the advancement of mobile technology, editing photos on your smartphone has become easier and more accessible than ever. Whether you’re a professional photographer, an aspiring content creator, or someone who simply enjoys capturing memories, having the right editing tools can make a significant difference in the quality of your images. One such tool that has gained immense popularity among photographers is Lightroom Mobile. This powerful app offers a wide range of features that allow users to enhance their photos with precision and creativity, making it an essential tool for mobile photography enthusiasts.
Take Your Photography to the Next Level with Lightroom Mobile
Lightroom Mobile provides a user-friendly interface packed with professional-grade editing capabilities. From adjusting exposure and contrast to fine-tuning colors and sharpening details, the app offers everything you need to transform ordinary photos into stunning visual masterpieces. However, achieving a consistent and polished look can be time-consuming, especially if you’re editing multiple images. This is where premium presets come in handy.
Enhance Your Images with Premium Presets
One of the most effective ways to enhance your photos effortlessly is by using premium Lightroom Mobile presets. These presets are pre-configured editing settings that instantly apply specific adjustments to your photos, helping you achieve professional-quality results with just a tap. Instead of manually tweaking each setting, presets allow you to apply a refined look instantly, making them a valuable tool for both beginners and experienced editors.
Whether you’re working with portrait photography, landscape shots, or social media content, using premium presets can help you maintain a cohesive and visually appealing aesthetic across your images. Additionally, they save time by eliminating the need for extensive manual editing, allowing you to focus more on capturing the perfect shot.
Achieve Professional-Quality Results with Just a Tap
Premium Lightroom Mobile presets are carefully designed to enhance the mood, tone, and overall quality of an image. Whether you want to create vibrant colors, deep contrasts, or a soft, cinematic feel, there’s a preset tailored to your needs. These presets take the guesswork out of editing, providing a quick yet effective way to achieve high-end photography results without requiring advanced editing skills.
From travel bloggers and influencers to wedding photographers and creative professionals, many rely on premium presets to elevate their work. They ensure consistency in your visual style, which is crucial for building a recognizable brand or maintaining an engaging social media presence.
Explore the Top 3 Premium Lightroom Mobile Presets
To help you get started, we’ve compiled a list of the top three premium Lightroom Mobile presets that will elevate your photo editing game. Whether you want bold and dynamic tones, a rich cinematic effect, or a soft and dreamy atmosphere, these must-have presets will make your images stand out effortlessly.
By incorporating these presets into your editing workflow, you can achieve a level of professionalism and creativity that enhances your photography skills. If you’re looking to transform your mobile photography, investing in high-quality Lightroom Mobile presets is a game-changer.
What is the Lightroom app?
Adobe Lightroom is a powerful and versatile photo editing app designed for both professional photographers and casual users who want to enhance their images effortlessly. Whether you’re looking to fine-tune a simple snapshot or create a masterpiece, Lightroom offers a seamless and intuitive editing experience.
Available on Mobile for Editing Anytime, Anywhere
Lightroom is available on both iOS and Android devices, making it a perfect solution for editing photos on the go. Whether you’re capturing breathtaking landscapes, portraits, or everyday moments, the app provides a suite of advanced editing tools that allow you to transform your images instantly.
Professional-Grade Editing Tools at Your Fingertips
The Lightroom app gives users full control over their images by allowing precise adjustments to key elements such as exposure, contrast, color balance, sharpness, and saturation. In addition to basic adjustments, the app includes advanced editing features like:
- Gradients and selective adjustments for fine-tuning specific areas of an image
- Curves tool for precise tonal control
- Masking capabilities to edit subjects separately from the background
- RAW file support, which retains the highest image quality for professional-level editing
Instant Enhancements with Presets
One of Lightroom’s most powerful and time-saving features is its preset library. Presets are pre-configured editing settings that allow users to apply a particular look to their photos with just one tap. Whether you prefer vibrant colors, cinematic tones, or moody aesthetics, presets make it easy to achieve a consistent and professional edit in seconds.
Cloud Storage and Cross-Device Syncing
Another standout feature of Lightroom is its cloud storage integration, allowing users to store, organize, and sync their photo library across multiple devices. Whether you’re editing from your smartphone, tablet, or desktop, Lightroom ensures that your work is always accessible and up to date.
A Must-Have Tool for Every Photographer
From hobbyists to professional photographers, Lightroom Mobile is an essential tool for anyone who wants to create high-quality, visually stunning images. With its powerful editing tools, advanced features, and seamless cross-device syncing, Lightroom remains one of the best photo editing apps available today.
How to Edit Photos in Lightroom Mobile
Editing photos in Lightroom Mobile is a straightforward yet powerful process that allows you to enhance your images with precision. Whether you’re a beginner or a professional, Lightroom offers a range of tools to help you achieve stunning results. Follow this step-by-step guide to edit your photos like a pro.
1. Import Your Photo
Before you start editing, you need to import your photo into Lightroom:
- Open the Lightroom Mobile app.
- Tap the “+” icon (usually found at the bottom right corner).
- Choose to import an image from your device’s gallery or take a new photo directly in the app.
- Once imported, the photo will appear in your Lightroom library, ready for editing.
2. Basic Adjustments
Once your photo is imported, tap on it to open the editing workspace. At the bottom of the screen, you’ll find the main adjustment tools. Start with these essential edits:
- Exposure – Adjusts the overall brightness of the photo.
- Contrast – Controls the difference between light and dark areas.
- Highlights – Adjusts the brightness of bright areas (like the sky or reflections).
- Shadows – Lightens or darkens the darker areas of the photo.
- Whites – Modifies the brightest whites in the image.
- Blacks – Adjusts the darkest tones for better depth.
Use these sliders to balance the light and dark elements of your image for a natural and well-exposed look.
3. Color Adjustments
Color correction is essential for setting the mood and tone of your photo. The Color panel in Lightroom allows you to fine-tune the colors of your image with the following tools:
- White Balance (WB) – Adjusts the overall color temperature, making the image warmer or cooler.
- Tint – Fixes any unwanted green or magenta color casts.
- Vibrance – Enhances the saturation of muted colors without affecting skin tones.
- Saturation – Increases or decreases the intensity of all colors in the photo.
These adjustments can help make colors pop or create a more subdued, artistic effect.
4. Detail Enhancements
To improve the clarity and sharpness of your image, use these tools:
- Sharpening – Enhances fine details, making the image look clearer.
- Noise Reduction – Reduces graininess, especially useful for low-light photos.
This step is crucial for refining textures and ensuring your image looks crisp and professional.
5. Creative Edits (Effects & Presets)
Lightroom Mobile includes additional tools that add artistic flair to your images:
- Vignette – Darkens or lightens the edges to focus attention on the center.
- Dehaze – Removes haze or fog, improving overall clarity and contrast.
- Presets – Apply pre-configured editing settings to achieve a specific look instantly. Lightroom includes built-in presets, and you can also import premium or custom presets for unique styles.
6. Crop and Straighten
Cropping helps frame your subject better and remove distractions:
- Tap the Crop Tool (square icon with arrows).
- Adjust the aspect ratio (e.g., 1:1 for Instagram, 16:9 for widescreen, etc.).
- Straighten the image if the horizon is tilted.
- Rotate or flip the image if necessary.
Proper cropping can significantly enhance composition and visual appeal.
7. Advanced Editing (Masking & Local Adjustments)
For more precise edits, Lightroom Mobile offers masking tools, allowing you to edit specific areas of a photo:
- Brush Tool – Manually paint over areas to adjust exposure, contrast, or color.
- Radial Gradient – Applies effects to a circular area (useful for highlighting faces).
- Linear Gradient – Applies adjustments to a larger section, like brightening the sky or darkening the background.
These tools allow for detailed corrections, helping certain elements stand out while maintaining a natural look.
8. Saving and Exporting Your Edited Photo
Once you’re satisfied with your edits, it’s time to save or share your image:
- Tap the Share/Export icon in the top-right corner.
- Select your export settings, including file type (JPEG, PNG, or TIFF), quality, and resolution.
- Save the photo to your device’s gallery or share it directly on social media platforms like Instagram, Facebook, or WhatsApp.
Final Thoughts
Editing in Lightroom Mobile is both simple and powerful, offering tools to enhance exposure, colors, details, and creative effects. Whether you’re using manual adjustments or presets, you can achieve professional-quality edits in just a few taps.
With consistent practice, you’ll develop your unique editing style and take your mobile photography to the next level. Start experimenting today and transform your images with Lightroom Mobile!
Pro Tip: Use Lightroom Presets for Effortless Editing
One of the best ways to enhance your photos quickly in Lightroom Mobile is by using presets—pre-configured editing settings that apply a professional touch instantly. Whether you want a warm, vintage look or a vibrant, high-contrast edit, presets allow you to achieve consistent, polished results with a single tap.
Lightroom offers both free and premium presets, giving you access to a variety of styles. You can find built-in presets in the app or download custom ones for even more creative control.
What is a Lightroom Preset?
A Lightroom preset is a collection of pre-configured photo adjustments that can be applied to an image instantly. Instead of manually adjusting exposure, contrast, colors, and sharpness every time, presets apply a predefined look with just one click.
Presets help streamline the editing process, making it easier for photographers and content creators to achieve consistent, high-quality results quickly.
How Do Lightroom Presets Work?
Presets work by automatically adjusting an image’s settings in the background based on a preset’s parameters. They don’t replace your ability to edit manually—you can still tweak and customize the settings further to fit your specific image and style.
Types of Lightroom Presets
Lightroom presets come in a variety of styles and purposes, catering to different photography needs. Here are the most common types:
1. Basic Presets
- Adjust brightness, contrast, and color tones for quick improvements.
- Includes presets like Brighten, Warm Tone, Black & White, and Cool Shadows.
2. Creative Presets
- Designed to give photos a unique artistic flair.
- Includes effects like Vintage, Film Look, Soft Pastels, and Dramatic Tones.
3. Professional Presets
- Developed by expert photographers, these presets provide high-end, detailed adjustments.
- Examples include HDR (High Dynamic Range), Portrait Enhancements, and Nature Photography Enhancements.
4. Mobile Presets
- Optimized specifically for Lightroom Mobile, making them ideal for social media editing.
- Includes presets tailored for Instagram influencers, travel bloggers, and lifestyle photographers.
Benefits of Using Lightroom Presets
✅ Save Time – Apply a preset in seconds instead of manually adjusting each setting.
✅ Maintain Consistency – Ensure a uniform style across multiple images, perfect for social media feeds, portfolios, and brand photography.
✅ Enhance Creativity – Experiment with different styles without spending hours adjusting every detail.
✅ Beginner-Friendly – Even if you have no prior editing experience, presets allow you to create professional-quality edits effortlessly.
How to Use Lightroom Presets
🔹 Step 1: Download or Create a Preset
- Lightroom offers built-in free presets, but you can also download premium presets or create your own custom presets.
🔹 Step 2: Apply the Preset
- Select the photo you want to edit.
- Open the Presets Panel (found at the bottom of the editing screen).
- Choose and apply the preset that best fits your photo.
🔹 Step 3: Customize Your Edit
- Adjust settings like exposure, highlights, shadows, and color balance to fine-tune the look.
- Presets are just a starting point—you can modify them to suit your unique style.
🔹 Step 4: Save and Export
- Once satisfied with the edits, save the image to your gallery or export it to social media platforms.
Popular Types of Lightroom Presets
📌 Vintage/Film Look – Adds a nostalgic or retro feel with warm tones, soft contrasts, and grain.
📌 Moody & Dark – Enhances shadows and deepens contrast for a dramatic, mysterious effect.
📌 Bright & Airy – Lightens the image, enhances soft highlights, and creates a clean, fresh aesthetic (often used in wedding & lifestyle photography).
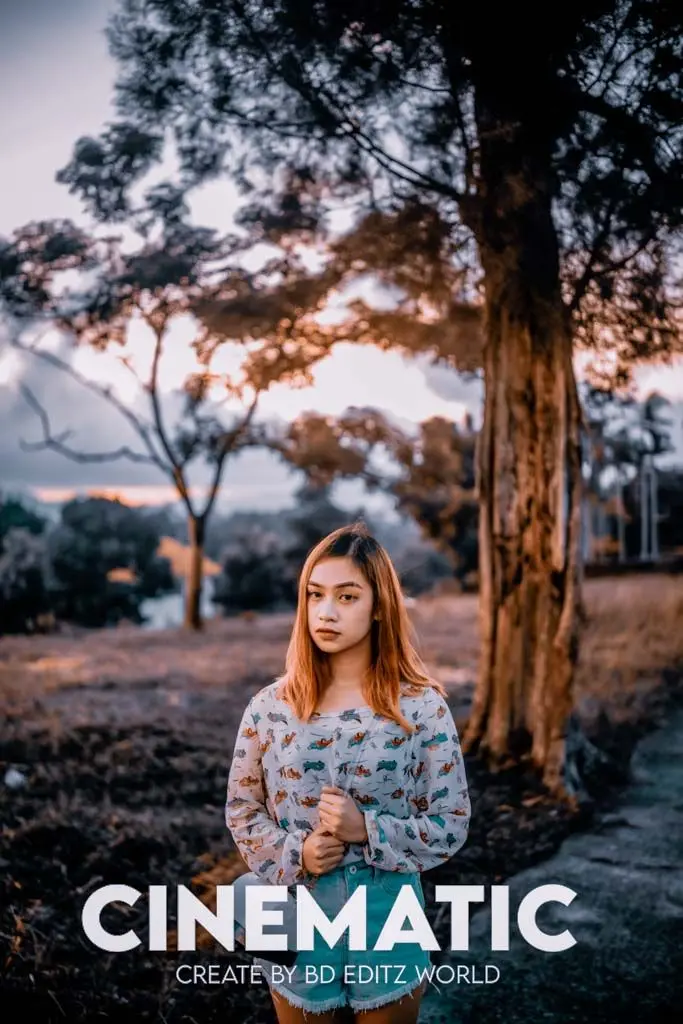
📌 Cinematic Look – Gives your photos a Hollywood-style touch, often featuring muted colors, teal-orange tones, or deep contrasts.
How to Download and Install Lightroom Presets
Downloading and installing Lightroom presets is an easy process, whether you’re using Lightroom Desktop (Windows/Mac) or Lightroom Mobile (iOS/Android). Follow this guide to access and apply free or premium presets to enhance your photos effortlessly.
For Lightroom Desktop (Windows/Mac)
Step 1: Find and Download Presets
Lightroom presets are available from various sources, including:
- Adobe’s official website
- Creative Market
- Etsy
- Photography blogs & preset creators’ websites
Presets for Lightroom Classic usually come in .xmp or .lrtemplate file formats, while Lightroom CC (Cloud Version) uses .xmp files.
Step 2: Install Presets in Lightroom Desktop
🔹 For Lightroom Classic (Desktop Version)
- Download the preset files to your computer.
- Open Lightroom Classic and go to the Develop module.
- On the left panel, find the Presets section.
- Right-click in the Presets panel and select Import.
- Locate the downloaded .xmp or .lrtemplate preset files.
- Select the files and click Import.
- Your new presets will now appear in the Presets panel on the left.
🔹 For Lightroom CC (Cloud Version)
- Download the preset file (.xmp format).
- Open Lightroom CC and click on the Presets icon in the left panel.
- Click the three-dot menu at the top and select Import Presets.
- Find and select the downloaded .xmp preset files.
- Click Import, and your presets will now be available in the Presets panel.
Step 3: Apply the Preset
- Open any photo in your Lightroom Library.
- In Lightroom Classic, go to the Develop module.
- In Lightroom CC, open the Edit panel.
- Find your preset in the Presets panel and click to apply it.
- You can further adjust settings to fine-tune your image.
For Lightroom Mobile (iOS/Android)
Step 1: Download Mobile Presets
Lightroom Mobile presets are usually available in .DNG (RAW image format). You can find free and premium presets from:
- Online preset stores & creators
- Social media platforms like Instagram & Pinterest
- Photography blogs and preset marketplaces
Step 2: Install Presets in Lightroom Mobile
🔹 Using DNG Files (for Mobile Presets)
- Download the .DNG preset files to your phone.
- Open the Lightroom Mobile app.
- Tap the + icon (bottom right) to import the DNG files into an album.
- Open a DNG file in Lightroom Mobile.
- Tap the three dots in the top-right corner and select Create Preset.
- Name your preset and save it under a relevant category.
Step 3: Apply the Preset in Lightroom Mobile
- Open the photo you want to edit.
- Tap the Presets icon at the bottom.
- Select your downloaded preset from the User Presets section.
- Tap on the preset to apply it.
- Further adjust settings to match your desired look.
Bonus Tips for Using Lightroom Presets
✅ Organize Presets Efficiently – Group presets into folders to make them easy to access.
✅ Free vs. Premium Presets – Free presets are great for beginners, but premium presets often provide more refined effects.
✅ Sync Across Devices – If you use Lightroom CC with cloud storage, your presets will sync across all devices, allowing easy access from desktop and mobile.
By following these steps, you can download, install, and use Lightroom presets effortlessly, helping you create stunning photos with just a single tap! 🚀
Frequently Asked Questions (FAQs)
1. What are Lightroom Mobile presets?
Lightroom Mobile presets are pre-configured editing settings that instantly enhance your photos with one click. They adjust aspects like exposure, contrast, saturation, and color grading, helping you achieve a professional look quickly and consistently.
2. Can I create my own Lightroom Mobile preset?
Yes! After editing a photo to your liking, tap the three dots (menu) in the top-right corner and select “Create Preset.” Give it a name and save it for future use.
3. Do I need an Adobe subscription to use Lightroom Mobile presets?
No, you can use Lightroom Mobile for free! However, certain premium features—like cloud syncing and access to exclusive presets—require a paid Adobe Lightroom subscription. You can still use custom and downloaded presets with the free version.
4. Are Lightroom Mobile presets compatible with both iOS and Android?
Yes! Lightroom Mobile presets work seamlessly on both iOS and Android devices, as long as you have the Lightroom app installed.
5. Do Lightroom Mobile presets work on all photos?
Presets can be applied to any photo, but the results may vary depending on:
✔️ Lighting conditions
✔️ Original exposure
✔️ Color balance
Minor adjustments may be needed to get the perfect look after applying a preset.
6. Are there free Lightroom Mobile presets available?
Yes! Many photographers and content creators offer free presets online. While premium presets provide more polished, professional results, free presets are a great starting point for beginners.
7. Can I use Lightroom Mobile presets on RAW photos?
Yes! Lightroom Mobile supports RAW photo editing, allowing you to apply presets to RAW, JPEG, and TIFF files. RAW files retain more detail, giving you greater flexibility when adjusting exposure, shadows, and highlights.
8. Can I use multiple presets on a single photo?
Yes, but applying a new preset will overwrite the previous one. If you want to combine effects, apply one preset first, then manually adjust the settings before adding another.
Conclusion
Lightroom Mobile is a powerful tool that brings professional photo editing to your fingertips. Paired with premium presets, it allows users to enhance their images effortlessly while achieving stunning, polished results.
The top premium Lightroom Mobile presets offer a variety of effects—from vibrant color enhancements to moody cinematic tones—making them essential for photographers, influencers, and content creators.
By using presets, you can:
✔️ Save time on editing
✔️ Maintain consistency across multiple images
✔️ Achieve professional-quality results with minimal effort
Whether you’re a beginner or a pro, Lightroom presets help transform ordinary photos into visually stunning works of art! 🎨✨
Would you like recommendations for the best free or premium presets? Let me know! 🚀