

If you are an active user of Instagram, Facebook, or other social media platforms, you may have come across the name Rohit Zinjurke. As a popular digital creator and social media influencer, Rohit has built a massive following by sharing captivating and visually stunning photographs that attract thousands of likes and engagement. His unique photo editing style is one of the main reasons behind his widespread recognition and influence online.
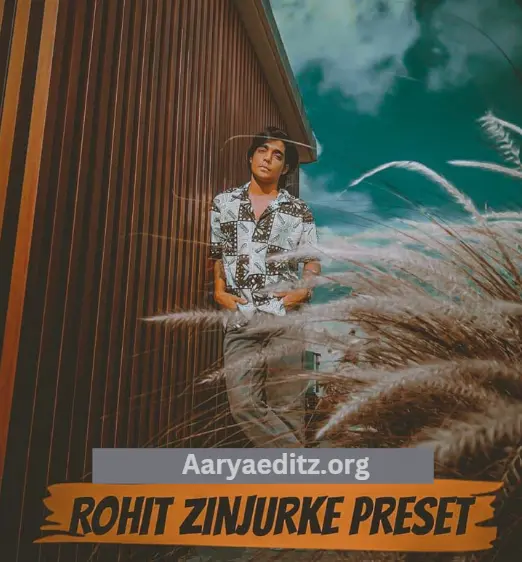
One of the standout aspects of Rohit Zinjurke’s photos is their distinct cinematic aesthetic, which makes them look highly professional and visually appealing. His signature editing technique enhances the depth, contrast, and mood of each image, setting his content apart from standard smartphone photography. This stylized editing approach has become a trend, inspiring many aspiring influencers, photographers, and content creators to replicate the same high-quality look in their own images.
The good news is that you don’t need advanced editing skills or hours of manual adjustments to achieve this professional cinematic look. With Rohit Zinjurke’s Lightroom Presets, you can instantly transform your ordinary photos into breathtaking visuals with just one click. These presets are carefully crafted to apply the same color tones, lighting effects, and contrast adjustments that Rohit uses in his own photography.
By using these Lightroom Presets, you can enhance your images effortlessly, achieving a professional-grade edit in a fraction of the time it would take through traditional manual editing. Whether you’re a beginner experimenting with photo editing or an experienced content creator looking for a faster workflow, these presets provide a powerful, efficient, and easy way to make your photos look incredible.
If you’re new to Lightroom Presets, there’s no need to worry. This guide will walk you through the entire process of downloading, installing, and using these presets in Adobe Lightroom, ensuring that you can apply them seamlessly to your photos. With step-by-step instructions and practical tips, you’ll learn how to make the most out of these presets, even if you have no prior experience in professional photo editing.
By the end of this article, you’ll have the tools and knowledge to enhance your photos like a pro, capturing the cinematic style and visual impact that Rohit Zinjurke is known for. Whether you’re aiming to elevate your social media content, create eye-catching posts, or simply improve your photography, these presets will help you achieve outstanding results with minimal effort.
Let’s dive in and unlock the creative potential of Rohit Zinjurke’s Lightroom Presets—giving your photos the same professional, cinematic transformation that has made his images so popular online!
Who is Rohit Zinjurke?
Rohit Zinjurke is a well-known Indian social media influencer, photographer, and digital content creator who has gained immense popularity for his exceptional photo editing skills and visually captivating content. His presence on platforms like Instagram, Facebook, and YouTube has attracted a massive audience, making him one of the most influential figures in the Indian photography and influencer community.
With a keen eye for detail, creativity, and a passion for photography, Rohit has developed a signature editing style that blends vibrant colors, dramatic lighting, and cinematic tones to create stunning, high-impact visuals. His unique approach to photography and editing has set him apart from the crowd, earning him a dedicated fan base and inspiring countless aspiring photographers and content creators who want to replicate his cinematic, moody aesthetic.
One of the key reasons behind Rohit Zinjurke’s growing influence is his ability to transform ordinary photos into professional-quality images using advanced editing techniques. His expertise in photo manipulation, color grading, and enhancement has made his content stand out, often receiving thousands of likes and engagement from followers who appreciate his artistic vision and technical mastery.
Beyond his photography work, Rohit has also made a significant impact by sharing his expertise through Lightroom presets—pre-configured editing settings that allow users to achieve his signature look effortlessly. These presets are particularly beneficial for beginners and even experienced photographers who want to enhance their images quickly without spending hours on manual adjustments. By using his Lightroom Presets, anyone can achieve the same high-quality, cinematic effects that have made his content so popular.
Rohit Zinjurke’s portfolio features a mix of landscapes, portraits, lifestyle shots, and creative compositions, all of which showcase his exceptional ability to play with light, color, and depth. His ability to consistently produce aesthetic and visually engaging photos has solidified his place as a trusted name in the world of digital photography, editing, and social media influence.
What is Adobe Lightroom?
Adobe Lightroom is a powerful, professional-grade photo editing software developed by Adobe that is widely regarded as one of the best tools for color correction, enhancement, and creative photo manipulation. Whether you’re working on a desktop or mobile device, Lightroom offers an array of advanced features that allow photographers and content creators to refine their images with precision and efficiency.
Unlike traditional editing software that requires extensive manual adjustments, Lightroom streamlines the editing process with its intuitive interface and smart automation tools. It is designed to enhance the overall aesthetics of an image by allowing users to adjust brightness, contrast, saturation, sharpness, and more with just a few clicks.
One of the most powerful features of Lightroom is the Lightroom Preset—a pre-configured set of adjustments that can be applied to photos instantly. Presets simplify the editing workflow by automating color grading, exposure settings, and tonal corrections, ensuring consistency across multiple images. Instead of spending hours tweaking settings manually, users can apply a preset and achieve a professional-quality edit in seconds.
For photographers, influencers, and social media content creators, Lightroom Presets have become an essential tool for maintaining a consistent and polished look across their portfolios. Whether you’re looking to create a warm and vintage aesthetic, a bold and vibrant style, or a cinematic and moody feel, Lightroom provides the flexibility and customization needed to bring your creative vision to life.
Adobe Lightroom is readily available on both Android and iOS devices, making it accessible to a wide range of users. It can be downloaded from the Google Play Store and Apple App Store, ensuring that whether you prefer editing on your smartphone, tablet, or desktop, you have a seamless and powerful editing experience at your fingertips.
With its user-friendly interface, professional editing capabilities, and support for presets, Adobe Lightroom remains the go-to choice for both amateur and professional photographers looking to elevate their photo editing game and produce visually stunning images with ease.
How to Download Rohit Zinjurke Preset?
If you’re a fan of Rohit Zinjurke’s stunning photography and cinematic editing style, you can easily achieve a similar look by using his custom Lightroom Presets. These presets are designed to apply pre-configured color grading, tonal adjustments, and enhancements to your photos with just one click, saving you time and effort.
By using Rohit Zinjurke’s Lightroom Presets, you can transform your ordinary photos into vibrant, high-quality visuals that reflect his signature cinematic and moody aesthetic. Follow this step-by-step guide to download and install the presets on your device.
Step 1: Find a Reliable Source
Before downloading Rohit Zinjurke’s Lightroom Presets, it’s important to ensure that you’re getting them from a trustworthy and official source to avoid malware or low-quality presets. Here are some of the best places to look for his presets:
- Official Website – Rohit Zinjurke may have a dedicated website or an online store where he officially sells or shares his Lightroom Presets. This is the safest and most reliable way to access them.
- Social Media Links – Follow Rohit on Instagram, YouTube, and Facebook, as he often shares direct download links or announces preset giveaways on his social media platforms.
- Photography Communities & Forums – Many photographers and content creators share and discuss presets in online photography communities. However, be cautious and verify the authenticity of any third-party download links.
💡 Important Note: Avoid unauthorized websites that claim to offer free presets but may contain spam, malware, or altered versions that do not deliver the same quality results.
Step 2: Download the Preset File
Once you’ve found a trusted source, follow these steps:
✅ Click on the download link provided.
✅ The preset file will typically be in one of the following formats:
- ZIP file – A compressed folder containing multiple preset files.
- DNG file – A RAW image file that contains preset settings (used for Lightroom Mobile).
- XMP file – The standard preset file format for Lightroom Classic (Desktop).
If the preset is in a ZIP file, you will need to extract it before importing it into Lightroom.
Step 3: Extract the ZIP File (If Applicable)
If your download is in ZIP format, you’ll need to unzip the file to access the preset files.
📱 On Mobile (Android/iOS):
- Use your device’s file manager or an unzip app (such as WinZip or ZArchiver).
- Locate the downloaded ZIP file, tap it, and select Extract to access the preset files.
💻 On Desktop (Windows/Mac):
- Right-click on the ZIP file and select “Extract All” (Windows) or “Open With > Archive Utility” (Mac).
- A new folder containing the preset files will be created.
Once extracted, you’re ready to import the presets into Adobe Lightroom.
Step 4: Import the Preset into Lightroom
Now that you have the preset files, follow these steps to import them into Adobe Lightroom:
For Lightroom Mobile (Android/iPhone/iPad)
- Open the Adobe Lightroom app on your mobile device.
- Tap on the Presets panel (usually found in the Edit menu).
- Tap the three-dot menu or “Add Preset” option.
- Select “Import Preset” or “Import from File”.
- Navigate to the folder where you extracted or saved the DNG or XMP file.
- Tap the file, and Lightroom will automatically import and save the preset.
For Lightroom Desktop (Windows/Mac)
- Open Adobe Lightroom Classic on your computer.
- In the Develop module, locate the Presets panel on the left sidebar.
- Click on the “+” icon next to Presets and select “Import Presets”.
- Navigate to the folder where you extracted or saved the XMP preset file.
- Select the preset(s) and click “Import”.
- The presets will now appear in the Presets panel, ready for use.
Step 5: Apply the Preset to Your Photos
Now that your preset is successfully imported, you can apply it to your photos in just one click!
✅ Open an image in Lightroom (Mobile or Desktop).
✅ Navigate to the Presets panel and select Rohit Zinjurke’s preset from your list.
✅ Click on the preset name, and Lightroom will instantly apply the pre-configured settings to your photo.
This will give your image the cinematic, high-contrast, and vibrant look that Rohit Zinjurke is known for.
Step 6: Fine-Tune the Edit (Optional)
Every photo is different, so you may need to adjust the settings slightly to match your image perfectly.
🎨 Adjust the following if needed:
- Exposure – Increase or decrease brightness based on your original image.
- Contrast & Highlights – Fine-tune the intensity of light and shadows.
- Saturation & Vibrance – Adjust color richness and intensity.
- Sharpening & Clarity – Enhance texture and crisp details.
Once you’re satisfied with the final look, save and export your photo in high resolution! 🎉
How to Use Rohit Zinjurke Lightroom Preset?
If you’re looking to edit your photos like Rohit Zinjurke, using his Lightroom Presets is the easiest and most effective way to achieve that cinematic, vibrant, and professional look. Whether you’re a beginner or an experienced photo editor, this guide will walk you through the step-by-step process of applying the preset to your photos.
Step 1: Install the Adobe Lightroom App
Before you can use Rohit Zinjurke’s Lightroom Preset, you need to download and install Adobe Lightroom on your mobile device.
✅ For Android Users: Download Adobe Lightroom from the Google Play Store.
✅ For iOS Users: Download Adobe Lightroom from the Apple App Store.
Once installed, launch the app and sign in with your Adobe account or create a new one if needed.
Step 2: Select Your Photo & Preset
1️⃣ Open the Lightroom app and navigate to your photo library.
2️⃣ Tap the “+” (Add Photo) button to import the photo you want to edit.
3️⃣ Similarly, import the downloaded Lightroom preset (if it’s in DNG format).
Step 3: Apply the Preset to Your Photo
💡 There are two ways to apply the preset, depending on the format of your file:
If Using a DNG File (Mobile Users):
1️⃣ Open the imported preset image (DNG file) in Lightroom.
2️⃣ Tap the three-dot menu (⋮) in the upper right corner.
3️⃣ Select “Copy Settings” and ensure that all relevant adjustments (like exposure, contrast, color grading) are checked.
4️⃣ Go back to your photo, tap the three-dot menu again, and choose “Paste Settings”.
Your photo will instantly transform with Rohit Zinjurke’s signature editing style! 🎨
If Using an XMP File (Desktop Users):
1️⃣ Open Lightroom on your computer.
2️⃣ Import the preset into the Presets Panel (follow the instructions from the previous section).
3️⃣ Click on the preset and apply it to your selected photo.
Step 4: Fine-Tune Your Edits (Optional)
Although Rohit Zinjurke’s preset is designed to give you professional-level edits instantly, you may need to adjust certain settings based on the lighting, subject, or composition of your image.
🎛 Recommended Adjustments:
- Exposure & Brightness – Increase or decrease based on your photo’s original lighting.
- Contrast & Highlights – Tweak for better depth and balance.
- Color Temperature & Saturation – Adjust warmth or coolness to match the mood.
- Shadows & Blacks – Enhance details in darker areas.
Once satisfied, save and export your professionally edited photo in high resolution! 📸✨
Need More Help? Watch the Tutorial!
If you prefer visual guidance, you can watch a step-by-step tutorial video (linked below). The video will walk you through the entire process, ensuring you get the best possible results from the preset.
📽️ [Insert YouTube Tutorial Link Here]
Alternatively, if you have any questions or need assistance, feel free to leave a comment, and we’ll be happy to help! 💬
Lightroom Preset System Requirements
Before installing and using Rohit Zinjurke’s Lightroom Preset, ensure that your device meets the minimum system requirements for smooth performance:
🔹 Operating System (OS): Android 6.0 (Marshmallow) or later.
🔹 RAM: Minimum 2GB (recommended 4GB+ for faster processing).
🔹 Storage: At least 1GB of free space to store photos and presets.
🔹 Processor: Quad-core CPU for better performance.
💡 Tip: If Lightroom runs slowly, clear cache files and close background apps to improve speed.
Best Features of Rohit Zinjurke Preset
Rohit Zinjurke’s Lightroom Presets come with powerful features that allow you to enhance your photos instantly with professional-grade effects. Here’s why these presets stand out:
✅ Advanced Color Grading – Achieve professional-level color adjustments effortlessly.
✅ Full Compatibility – Works with both RAW and JPEG image formats.
✅ Customizable Presets – Fine-tune settings to match your personal style.
✅ HDR Merge – Enhance dynamic range for stunning highlights and shadows.
✅ Optimized for High-Resolution Images – Ensures sharp and crisp details.
✅ Free to Download – Get access to premium-quality editing tools at no cost.
✅ Bug-Free Performance – Ensures a smooth and lag-free editing experience.
Frequently Asked Questions
What are Rohit Zinjurke Lightroom Presets?
Rohit Zinjurke Lightroom Presets are professionally crafted editing filters that allow you to achieve the same vibrant, cinematic, and high-contrast style seen in Rohit Zinjurke’s photos. These presets are pre-configured settings that instantly apply color grading, tone adjustments, exposure corrections, and other enhancements with just one click.
Using these presets, even beginners can easily create professional-looking images without spending hours manually adjusting settings in Lightroom.
How do I download Rohit Zinjurke Lightroom Presets?
To download Rohit Zinjurke’s Lightroom Presets, follow these steps:
1️⃣ Find a Trusted Source
- Visit Rohit Zinjurke’s official website, YouTube channel, or social media pages where he shares authentic preset download links.
- Check photography forums or trusted online communities that provide safe preset downloads.
2️⃣ Download the Preset File
- The presets are usually available in DNG, XMP, or ZIP format.
- Make sure to download from a legitimate source to avoid malware or corrupted files.
3️⃣ Save the Preset on Your Device
- If you’re using a mobile phone, save the preset file in your gallery or file manager.
- For desktop users, store it in an easily accessible folder before importing it into Lightroom.
Are these Lightroom Presets free?
Some of Rohit Zinjurke’s presets are available for free download, while others may require a purchase or subscription as part of a premium preset pack.
💡 Tip: If you’re looking for free presets, check Rohit’s official social media accounts where he occasionally shares download links. Always verify the source before downloading.
How do I install the presets in Lightroom?
After downloading the presets, you need to import and install them in Lightroom. Follow these simple steps:
🔹 For Lightroom Mobile (Android & iOS):
1️⃣ Open Adobe Lightroom Mobile.
2️⃣ Tap the ‘+’ icon to add a new image and select the DNG preset file.
3️⃣ Open the preset image, tap the three-dot menu (⋮), and select ‘Copy Settings’.
4️⃣ Open your photo, tap the three-dot menu (⋮) again, and select ‘Paste Settings’ to apply the preset.
🔹 For Lightroom Desktop (Windows & Mac):
1️⃣ Open Adobe Lightroom Classic.
2️⃣ Go to the ‘Develop’ module and locate the Presets Panel.
3️⃣ Click the ‘+’ button, then select ‘Import Presets’.
4️⃣ Navigate to the folder where you saved the XMP preset file and select it to import.
5️⃣ The preset will now appear in the Presets Panel, ready for use!
Can I use these presets on both mobile and desktop Lightroom?
Yes! Rohit Zinjurke’s Lightroom Presets are compatible with both:
✅ Lightroom Mobile (Android & iOS) – Works with DNG format presets.
✅ Lightroom Classic (Windows & Mac) – Supports XMP format presets.
Make sure you’re using the correct file format based on your device for a smooth editing experience.
Will these presets work on all photos?
While these presets are designed to enhance a wide range of images, the final results may vary based on:
📷 Lighting Conditions – Images with good lighting work best.
📷 Original Colors & Exposure – Some presets may require minor adjustments.
📷 Composition & Background – Certain styles work better for portraits, landscapes, or urban shots.
💡 Tip: If the preset doesn’t look perfect on your photo, you can manually adjust settings like exposure, contrast, and saturation to fine-tune the result.
Can I customize the preset after applying it?
Yes! Rohit Zinjurke’s presets serve as a starting point, but you can further adjust the settings to match your image perfectly.
🎛 Common Adjustments You Can Make:
- Brightness & Exposure – If the image is too dark or too bright, tweak this setting.
- Contrast & Highlights – Adjust to create more depth and definition.
- Color Temperature – Modify to enhance warm or cool tones.
- Saturation & Vibrance – Fine-tune color intensity.
These customizations allow you to personalize the preset and create a unique editing style.
Are these presets compatible with RAW and JPEG images?
Yes, Rohit Zinjurke’s Lightroom Presets work seamlessly with both:
✔ RAW files – Retain high image quality and work best for professional photographers.
✔ JPEG files – Work well for social media content and quick edits.
For best results, it’s recommended to edit RAW images since they offer more flexibility and better detail preservation when applying presets.
Conclusion
Rohit Zinjurke Lightroom Presets are a game-changer for photographers, influencers, and content creators who want to achieve stunning, cinematic edits with minimal effort. These presets provide:
✅ Vibrant Colors & Rich Contrast – Perfect for eye-catching social media photos.
✅ One-Click Enhancements – Save time with instant professional-quality edits.
✅ Customizable Adjustments – Modify settings to match your personal style.
✅ Compatibility with RAW & JPEG – Works with both professional and casual photography.
Whether you’re a beginner or an experienced editor, these presets help you enhance your photos quickly while maintaining a high-quality, polished look.
🚀 Ready to transform your images? Download Rohit Zinjurke’s Lightroom Presets today and give your photos the cinematic touch they deserve! 🎨📸
👉 Still have questions? Drop a comment below, and we’ll be happy to assist! 😊